Looking for the best online course platforms as an instructor or a free online course software to build, sell and make money? Great.
Truth is, as a teacher, knowing the best online course platforms for learning for your students can be hard.
And even harder if the platform is devoid of a good monetization method and educational facilities for your online school. Talking about monetization.
What’s the use of an online course platform if you can’t make money off your hard work?
I know it can be tough when you have just started, therefore, to make it easier for you, in this article, we will review and compare the best online course platforms for instructors & teachers to use at their disposal.
Creating an Online Course as an Instructor & Teacher
Do you know that as an instructor or teacher in your field, this market (online school) presents you with the best opportunity to make an insane amount of money? Here is it.
In the latest e-learning market analysis, trends, and forecasts, strategyr.com recorded that the e-learning market worldwide is projected to grow by USS312.5 billion.
Driven by a compound growth of academics, one of the segments analyzed a sized in this study displays the potential to grow at over 15.3%.
The shifting dynamics supporting this growth make it critical for businesses in this space to keep abreast of the changing pulse of the market.
Poised to reach over $202.7 Billion by the year 2025, Academic will bring in healthy gains adding significant momentum to global growth.
Here is another projected value of the global e-learning markets presented by Thinkific – According to Stratistics MRC, the Global E-Learning Markets accounted for $165.21billion in 2015 and is expected to reach $275.10 billion in 2022 growing at a CAGR of 7.5% during the forecast period.

To round it up, according to statista.com, here is the size of e-learning market in 2014 and 2022 (in million U.S. dollars).

The statistic shows the market size of the e-learning market worldwide in 2014 with a forecast for 2022. In 2016, the global e-learning market was worth 165.36 billion U.S. dollars and is projected to surpass 243 billion U.S. dollars at a 5.08 percent CAGR in 2022.
As we can see, this is a huge market, and more instructors, content owners, and entrepreneurs will be making millions of dollars on autopilot as soon as they set their courses or online school up just like John Lee who made over $43 grand with his podcast. Here is the short story.
After deciding and starting to create a daily podcast interviewing entrepreneurs in 2012, in October 2013, John launched the Podcasters’ Paradise online course. In January 2018 alone, it generated over $43,000 from it.
Therefore, it is important to understand that a lot of your success with creating an online course depends entirely on the software to create online training courses you choose because they are responsible for making sure that your courses are detailed and presentable with the help of the facilities available and hitch-free in terms of deliverability.
What to Look for in a good Online Teaching Platform for Teachers
A good online course should enable you to create a highly engaging and presentable online course with an easy user interface (ideally a drag-and-drop editor).
You should be able to easily customize and personalize your online course the way you want with automation to make it work on autopilot.
Aside from that, a good online course service for instructors & teachers must make it easy to manage your students, schools, and video hosting, plus advanced marketing tools to reach more students.
Also, there should have adequate facilities for instructors to measure the demographics, analytics, and in-depth data analysis and performance of their online school.
Most importantly, a good online teaching provider must ensure that there are educational infrastructures such as quizzes, surveys, discussions, etc.
Having said that, let’s take a look at a list of the most popular online learning platforms and how they stack up against each other.
The Top Online Course Platforms for Teachers

1. Thinkific
Being one of the most recommended platforms you can use for online courses, higher institutions, solo, and team course launches, course experts have all the best things to say about Thinkific.
Thinkific is my first choice online teaching platform for teachers. Let’s see.

Thinkific is a software platform that enables entrepreneurs to create, market, sell, and deliver their own online courses.
Its mission is no less than to revolutionize the way people learn and earn online by giving them the tools they need to turn their expertise into a sustainable business that impacts both them and their audiences.
Thinkific’s CEO is Greg Smith. This startup commands a workforce of 100 dedicated employees in over 15 countries represented globally. Amazingly, 50% of the leadership team are women.
Cons with Thinkific
- They have a limited payment integration system — just Stripe and PayPal.
- Not in-depth with data reporting for creators.
- They do not offer live instant chat.
Pros with Thinkific
- Offers free “but limited” plan for users.
- Targeted sales and marketing strategies for creators.
- Zero transaction fees.
- It allows unlimited Courses, video hosting, and unlimited users.
- It offers a simple and clean interface for both beginners and advanced instructors.
- It offers advanced extensions & integrations for successful course building.
- Instructors can easily send course updates and announcements.
- Instructors can make recurring income via upselling to students.
- Thinkific allows for instant payouts.
- Thinkific has an excellent customer support history, AKA, users are happy with the support they receive.
💡 Prices and Plans on Thinkific
With a 30-day money-back guarantee on all their plans – if you are not happy with it, Thinkific offers 3 Prices. It is worthy to note that all plans include 1 support team in online education.
To enjoy all the essential benefits of Thinkific, I don’t think you need the “Premier Plan” for now. I recommend the “PRO PLAN” if you want to make money fast with your course.
With the “Pro Plan”, you can make use of one of the most important money-maker strategies & facilities “: Advanced course pricing options:
The “Advanced Course Pricing Options” enables flexible pricing options for your courses & students (subscriptions, free, one-time, payment plans, or additional course prices).
On top of that, you make even more money using “Memberships and bundles”.
With “Memberships and bundles”, you can generate recurring revenue with memberships and upsell customers by bundling courses together. This is the secret of recurring income flow.
How to use: Building your Online Course on Thinkific
Here is how to get started with Thinkific.
When once you sign up, log in to your account. You will be asked to tell them about you. Go ahead and select the “lines” that best define you.

When done, click on “Start Creating Courses”.
After clicking “start creating courses”, at this point you can skip the dashboard if you want or click on “Get started” to start building your online course.

Your dashboard is clean and simple for everyone to work with. The online course software provides you with massive success checklists designed to help you build an amazing online course with Thinkific.

On your right-hand side, you can set up your course, and go on to measure how far you’ve gone. And if you need basic configuration, enrollments, and lead generation, those also, have been provided for you.
Going over to the second section, you are presented with clean navigation to manage your course creation.
You have the option to design your course site, market & sell, support for our students, settings, your training, customer support, and even more add-ons to make a successful course.
For me, I like the settings tab as I can readily set up & customize how I want my “SCHOOL” to be.

There are a lot of gadgets to help you build a dynamic course. When you go down you can easily add your payment option (PayPal or Stripe).
Also, after you add your course content, you can build your course site with their high-quality, well-designed templates, and many other options for a successful online course.
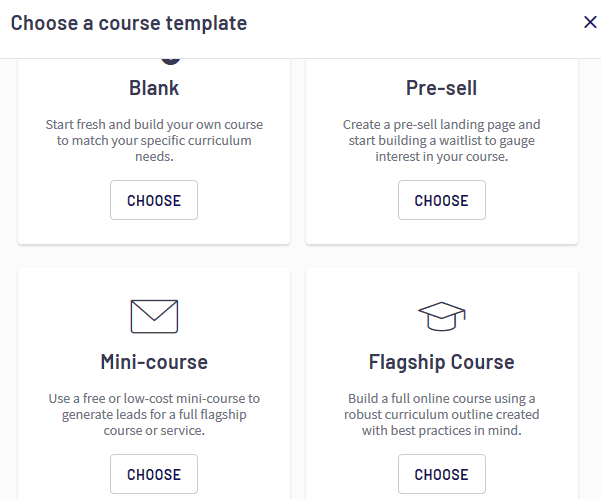
Make Money from your Course on Thinkific
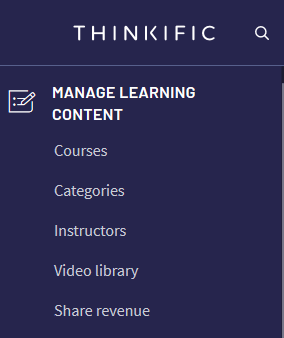
Upon selecting a course category and creating your first course you can get ready to make money. It’s time to market and sell your course with Thinkific advanced business tools.
Here’s Thinkific. But remember, the Pro Plan gives you the ability to create unlimited courses and make more money.
💡 Integrations on Thinkific
Thinkific has wide course integration extensions. When you log in you will find:
- E-commerce integration: Stripe, PayPal, Shopify, Stunning.
- Automation tools integration: Zapier and Infusionsoft.
- Analytics integration: Google Analytics, Facebook, and more
- Email marketing integration: MailChimp, Constant and more
- Student success integration: Disqus
- Growth tools integration: Sumo, and more suggestions.
💡 Customer Support on Thinkific
One thing I love about Thinkific is the preferential treatment they give to course creators. Thinkific is my recommended course creation platform, not because of its name “think specifically”, no.
You see, when a company thinks of the customers first plus advanced tools for both sides to make money; “course creators & the company, it’s a total win-win /collaborations for the parties”.
Thinkific provides the ultimate support, every step of the way.
Now for everyone who signs up as a course creator on Thinkific, you are allocated & entitled to a support team in case you need help.
To take advantage of this, check and click on the “Help button” just at the bottom left – of your dashboard.
💡 Creating a Course on Thinkific
There is no doubt that Thinkific is designed for both you and your audience.
Offering flexible prices with advanced facilities to make you money from the start, you can join other profitable course creators today to build and make money.
If ready, you can grab a 30 free trial or go with the “PRO PLAN” where you earn recurring income through enabling upsells and even set specific/flexible course prices and coupons for your students.
Get started today with a One-Month Free Trial of Thinkific’s Pro Plan with our link below.
:arrow: Try Thinkific for free
💡 Thinkific App Store
Discover apps that help you accelerate your business with Thinkific.
Collections include New Apps, Business Operations, Connections & Social, Email & Marketing, Engagement & Assessment, Learning Experience, Selling & Conversion, and more.
➡ Check out the Thinkific App Store
Thinkific “Rise this Fall” Program
Join the “Rise this Fall challenge” and get expert advice on 5 critical steps to building a successful online course business including winning tropic identification, idea validation, ideas for a complete curriculum, content creation, and more.
Check out the Thinkific Rise & Fall Program
2. LearnWorlds
LearnWorlds is my second choice online course platforms for learning. Let’s see.
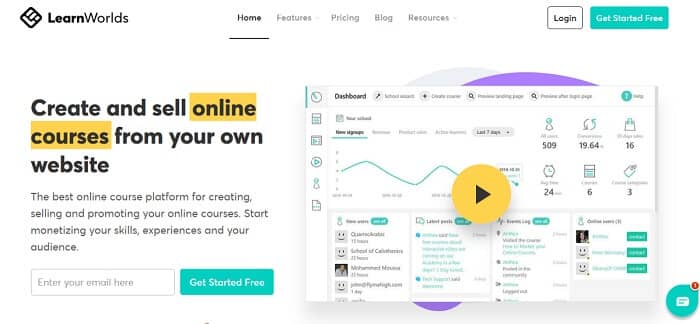
LearnWorlds is a powerful, easy-to-use, and reliable training platform for individuals, teachers, and enterprises. A fully customizable, white-label solution to train employees and associates, educate customers or sell online courses to a wide audience.
As a cloud-based e-learning platform with a clean and intuitive interface, LearnWorlds offers a super flexible platform to host an online school as an instructor.
With tons of instructional manuals, integrations, and templates that align with your need, and accommodating pricing, LearnWorlds is your best bet as far as you want an intuitive platform to host your online business.
Cons with LearnWorlds
- You will need to upgrade before using Zapier integration which opens you to many options.
- Inbuilt sales funnel systems and marketing strategies are not excellent unless with third-party integrations.
- There is no instant chat support for creators.
Pros with LearnWorlds
- Excellent customer support history.
- LearnWorlds offers a clean but loaded interface for both beginners and advanced instructors.
- LearnWorlds has a highly customizable platform to tweak the way you want.
- All the infrastructures on LearnWorlds are scalable and you can have as many administrators as you want as per your plan.
- It allows unlimited Courses, video hosting, and unlimited users.
- You get a variety of customer supports at your fingertips.
- Their pricing plans are fair and accommodating most especially for the new course instructors.
- They offer instant phone call support for users and QnA sessions with instructors.
- There are many advanced options you will rarely make use of (a great boost to creating an incredible online school).
Apart from the few cons and pros, I have listed, let’s go deeper for you to see why LearnWorlds is my second first choice and what you get is a course instructor and creator.
How to use: Building your Online Course/School on LearnWorlds
Because I love and I have seen what LearnWorlds offers course owners, I will walk you through how to get started and set up your course so you can do it right away when you sign up today.

Step 1. Sign up on LearnWorlds
To start building your online school, you will need to sign up to get a head start.
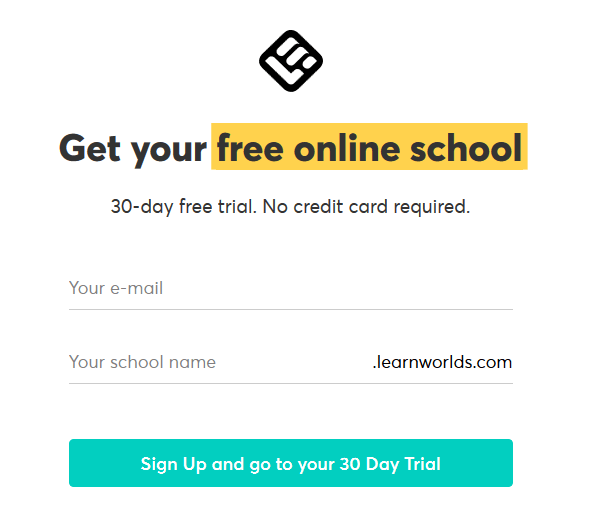
Enter your email address and the name of your school and hit the sign-up button to get started.
Wait for the preliminary setup.
Step 2. Set a Strong password
Make sure you use a strong password for your school.
To ease your suggestion, use strong strings for your password combination. You want to include %%*&* into your password. You can as well use the samples as given on LearnWorlds.
When done, click on “NEXT” below the page.
Step 3. Edit or Give a Name to your new online school.

Go ahead and edit if you already entered a name or give it a fresh name and move on by clicking the “Next” button.
Step 4. Set Your Language, Time Zone, and Currency
These are just the preliminary settings you want to customize. You can skip them for now if you want by clicking “take me to school now”.

If not, go ahead and enter them and move on.
After this step, click on “Finish” to access your online school dashboard”.
Step 5. Create a Course/School
Pause here and take a deep breath. I did say that LearnWorlds has a lot of benefits and features, right? I wasn’t joking.
If this is your first time with an online school platform then you might be overwhelmed. You will see the pic view of the “Learning Center” plan dashboard (below).
💡 Creating your course with the School Wizard Tool
With the School Wizard, you can edit and rename your school the way you want.
In the middle of your dashboard, you will see all your new sign-ups and the frequency – in the last 7 days, 14 days, and so on.
Going on, you will see the “Active Learners”, maybe you can award them something for being active, right?
Okay, to your middle right you will see all your course Categories, the Average Course Time, Conversions, and more.
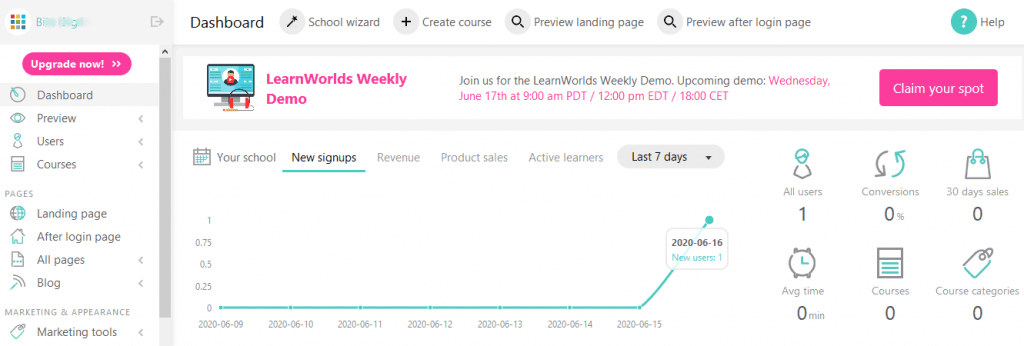
And to your bottom right you have a support button to click and get assistance if you need it anytime.

To your bottom left you have Pages that include your Landing Page, Login Page, All Pages, and Blog.
Going down you will see Marketing & Appearance. This is the section where your marketing tools are embedded and the appearance setup can be customized and modified as you want.
Also, you will see a Report Section where you monitor and manage your audiences or active students, the segmentation, their signs of progress, activities, and lastly, your overall sales.
Moving a bit to your bottom right (middle) you will see the list of new users, incredible tutorials and lessons from LearnWorlds, event logs report, and the online users you have at a time.
💡 Make Money from your Course on LearnWorlds
When your course or online school is fully set up where you will see both the conversion and the last 30 days sales, all you need to do is go to your bottom left > Settings and add your banking details for payments.

Just to note. I recommend you add your payment details as you get started so as not to stress yourself on that again.
Under the Setting sections, you will see the “Financial”. Under the Financial is where you will enter and manage all Financial Settings, the Payment Gateway you want to use, Invoices Set Up, and of course, the Subscriptions.
With all the Financials fully set up, you get paid for your courses as students troop in and sign up.
It’s great that you have an intuitive platform to customize everything the way it suits you and to standard.
💡 Customer Support on LearnWorlds
Love it that coupled with incredible features to craft an amazing online course/school they also offer relatively fair support for creators.
As a creator, you get phone support which is called toll-free, email support which is [email protected]. And of course, over 300+ guides to hone a perfect online school and course plus a “ask for help button” on your dashboard.
💡 Advanced Options with LearnWorlds
I would have missed this part unless I used this tool myself. Can you believe that LearnWorlds records accurate data on where all your students join or enroll from? Still, perplexed? Here are the things it records.
- Web browser used
- Language
- IP address
- Country
- Region
- City
- Operating System: Windows or Mac or if Mobile device.
You will see the Advanced Options under Event Logs > More Info”.
Are these not incredible? I find them to be. Super-versatile as a course platform.
The Good news, still? It is free to get started even without entering your credit card.
How to Create an Online Course on LearnWorlds in 6 steps
Step 1. Enter Course Name
When you click the “Create Course” button, you will be given a new page wherefore you need to enter your course name and click “Next” at the bottom right.

Step 2. Enter Course URL
Upon entering the name of your course, go ahead and give your course a friendly URL (slug).
What’s the essence of a Slug?
By giving a friendly URL you make your course more accessible both to people and search engines.
Here is an example of a slug billfaith.learnworlds.com/courses/how-to-start-a-blog.
When done, click on “Next” to continue.
Step 3. Select the Access Type of your Course
At this point, you can decide who should access your course. For instance, you can give access to the users that purchased it through the site (or have been manually enrolled in it by you as the administrator).
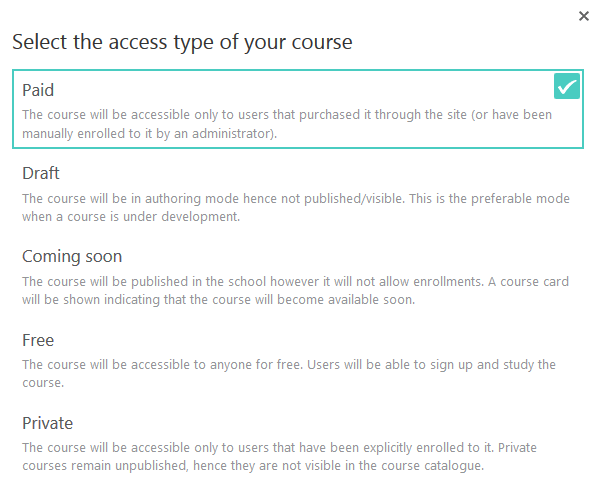
Also, if you want to keep it private, then you can make it accessible only to users that have been explicitly enrolled in it.
Private courses remain unpublished, hence they are not visible in the course catalogue (The same function you have on YouTube when you unlist a video or set it to Private).
Step 4. Enter Course Card Preview
Just as you would upload images and add a description to your blog posts, with the Course Card Preview, you want to enter a related description and also upload a fitting image.

Just to note, I like to get images from Pixabay, Unsplash, and Canva.com.
Upload your preferred image and enter the description to move on to the next step.
Step 5. Drip feed your Course
Drip feeding your course means you can “schedule the lesson delivery”. That is to say, schedule the timely release of your content, set up email reminders.
With LearnWorlds you have 2 Drips.
Drip by days
You can set to unlock course contents based on the date the student started the course (i.e. 1 week, 2 weeks). Each student will get access to the learning material separately.
Drip by date
You can also set to unlock course contents on specific dates regardless of the time students enrolled. All students will acquire access to the learning material at the same time.
Step 6. Set up and publish your Course
Amazing is what I can only describe in this course platform. You have a variety of tools, gadgets, and an intuitive editor to create the perfect course/school.
To test out various facilities, I recommend you go with the “Learning Center” package for a Free Trial.
Don’t just take my words for it. Here is what you’ll get.

PS: the tools and gadgets available on LearnWorlds to use and produce a super sellable course are just too plenty to mention in one review guide.
For instance, the “Add block Section” allows you to add”:
- Call to enrollment
- Instructors
- Payment Options
- With Images
- With Video
- Text & Images Layouts
- Text Columns
- FAQ
- Showcase LearnWorlds
- Testimonials
- MULTIMEDIA
- Video
- Background Video
- Embed
- Sliders
- CALL TO ACTION
- Login Forms
- Action buttons
- Get email
- Contact form
Believe me, I have cut out other gadgets. They are too good for one online school.
Should you be thinking about what I have cut out, then see a few.
PRODUCTS
- Your Courses
- Your Subscriptions
- Your Bundles
AUTO UPDATED CONTENT
- Course Contents
- Daily news cards
- Blog feed
- Community posts
Still, they are a few I have excluded. See the clean interface below.
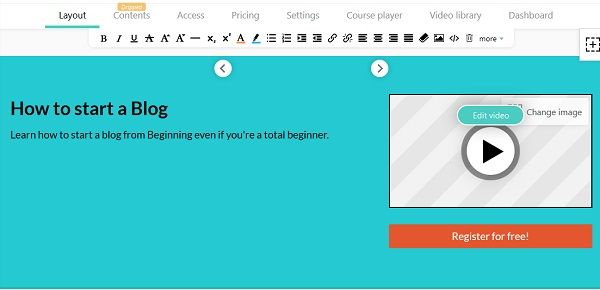
It will probably take me 24hrs plus to review everything on LearnWorlds as seen on the “create a course” editor. Here is what we will do.
After perfecting your course for your test. Scroll down and add your name, and image (as an instructor).
Also, go ahead and add your persona (author’s bio) and social media handles. LearnWorlds comes with many fonts and customizations you want to use.
When you’re done, go ahead and publish your course – make it accessible for your audiences. See below.
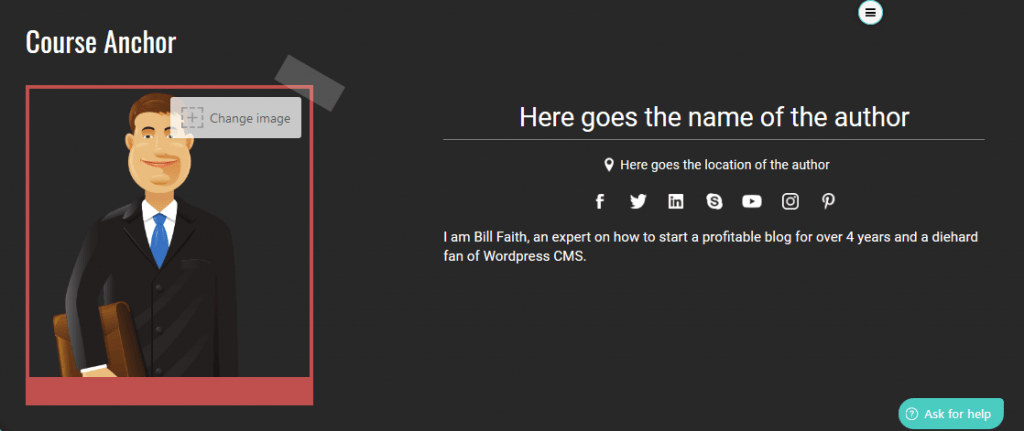
Truth is, LearnWorlds is awesome. (Kindly keep in mind that I have cut out many gadgets on the editor).
💡 Integrations on LearnWorlds
Here are some of the integrations with LearnWorlds to make a perfect online school/course.
Live sessions, Analytics, E-mail marketing, Growth tools, Affiliates, Customer service, Social proof, Zapier, and more.
Still, with the Zapier integration, you can add Fomo – a tool for Social Proof Notifications.
Also, you can add Tawk.to. Tawk.to is a live chat application that lets you monitor and chat with visitors on your website or from a free customizable page.
As you would guess, there are more integrations in which you check it out if you want.
Going on, you have an advanced gadget like Webhooks. Here is what Webhooks will do for you.
With it, you can provide other applications with real-time information.
Webhooks delivers data to other applications as it happens, meaning you get data immediately. Unlike typical APIs where you would need to poll for data very frequently in order to get it in real-time.
Okay, you will still have the option to give awards. You can easily trigger a POST JSON request to the specified URL when a user is awarded a certificate.
When a course is completed. Here you trigger a POST JSON request to the specified URL when a user completes a course. And more.
Good Lord, I am kind of swept off my feet now with the solution LearnWorlds proffer for course instructors.
Eagerly, my only thought now is, what do I not like about LearnWorlds? I will tell you below.
💡 Prices and Plans on LearnWorlds
With a 30 days satisfaction guarantee, and a no credit card to start your Free Trial, LearnWorlds Starter Plan goes for $24/mo if paid at once for a whole year.
With no transaction fees, the Professional Trainer plan is equipped with integrations and benefits which you get to pay only $79/mo if yearly which means you save a ton, an upfront of $240 with over 20% off.
Also, there is the Learning Center Plan at $249 which gives you breathtaking options to create a massive online school (just as I have used it above).
Need to manage more than 20 admins or something bigger? If yes, then you can book a demo with LearnWorlds as your best fit plan is the “High volume & Corporate” package.

Based on usage, the Learning Center Plan is robust for anything possible as far as building a reputable online school is concerned.
I recommend it if you’re on a budget. And if not, then the Pro Planner is also a good place to start building a scalable online course for your audiences.
💡 Getting Started with LearnWorlds
Going with LearnWorlds which is my FIRST OPTION and Recommendation to build your online school, my usage of the platform will only make sense if you try it out as well to test and prove it.
Apart from the benefits I have listed out which you’ve also seen how they work, the truth is, the hosting platform has more and enough to make your course look super-premium, considering the fact that it is cheaper than most of its competitors.
I would encourage you to spend about 45 minutes – a few hours and get acquainted with the platform plus the FREE lessons, guides, and Webinars offered to instructors by LearnWorlds. And not to worry, you have over 4 customer supports options in case you need help anytime.
➡ Get started for free with LearnWorlds
3. Teachable

Teachable is an online course platform where course creators create and sell beautiful online courses. Teachable is believed to be the platform used by the best online entrepreneurs to sell $300m+ to over 18 million students worldwide.
By usage, we’ve found that Teachable offers both basic and advanced service platforms for building and selling courses as a tutor.
Let’s see the cons and pros before we move on to getting started with them.
Cons with Teachable as an Instructor
- No instant support for Basic plan instructors.
As an instructor, it is believed that you will get started with either the Pro or Business plan on Teachable because, with any of them, you have enough course facilities to build your online school.
More so, there is instant support for you. But if you go with the Basic plan that has basic facilities then there is no online chat support available in case you need one.
- Not enough facilities to customize landing pages
When it comes to designing the landing pages, then you have a limited number of buttons to click and design it.
Overall, what’s available is okay for an instructor, unless you want an overblown landing page customization.
- Customer support history is not so good
Yes, the customer support history with Teachable hasn’t been so great, especially for the Basic plan users. As a course tutor, I recommend you start with the Pro or Business plan to get all the necessary supports you want.
Pros with Teachable as an Instructor
- Offers free “but limited” plan for users.
- It allows unlimited Courses, video hosting, and unlimited users
- It is a simple online school for instructors with few but basic modern infrastructures.
- It offers a generic platform for course instructors to easily produce content and make money.
- Instructors can easily send course updates and announcements.
- Instructors can make recurring income via upselling to students.
- Teachable is used by popular digital marketing influencers.
- The setup is easy.
- It is the go-to online course platform if you don’t want anything complicated.
💡 Make Money from your Course on Teachable
When your course is ready, you can add your PayPal address wherefore you will get paid by Teachable.
But remember, to enjoy more functions you need an upgrade.
Integrations on Teachable
Teachable also has wide course integration extensions. But you can only make use of them when you upgrade.
When you log in you will find Segment, Google Analytics, and Sumo.
Others as shown below.

How to use: Building your Course on Teachable
To build your first course, you need to log into your account. Upon login in, you will be taken to a course dashboard created for you – “MyTeachable”.
At your left-hand side, you will see: My School, Create a New School, Settings, Billing, Help, and logout”. That is all.
To create your online course, click on “Create a New School”. Name your school, or else click on skip.
On the next page, answer a few questions to help them get to know you better. When done, click on “Enter my School” and Start your course.

More features to use include”: Users, Site, Sales, Emails, Help, and TeachableU.
To customize your course with billing and more integrations, click on Settings.
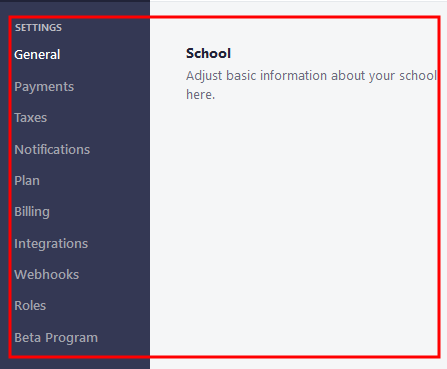
With the settings tab you get: General, Payments, Taxes, Notifications, Plan, Billing, Integrations, Webhooks, Roles, and Beta Program
💡 Getting Started on Teachable
If you go with Teachable’s free plan you will be limited in so many aspects of your course creation. To make proper sense of your course, I recommend you go with their popular Professional Plan at $79/month.
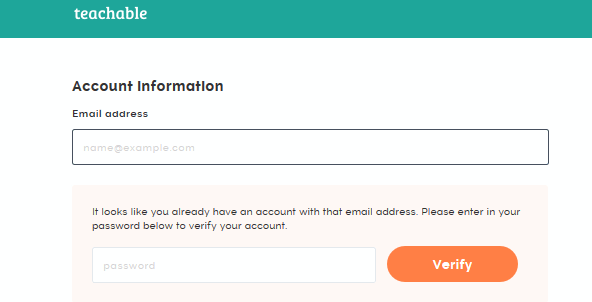
Purchase your plan, enter your information, create your account, verify, and log in to create your first course.
💡 Prices and Plans on Teachable
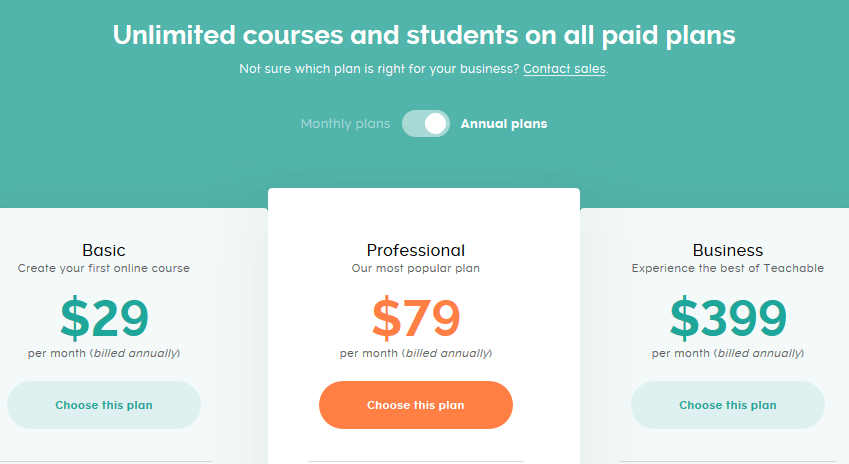
Teachable has 3 plans – BASIC, PROFESSIONAL & BUSINESS.
Teachable plans start at just $39 per month for its Basic package paid monthly or $29 if paid yearly. It also offers a Professional package at $119 per month or $99 if paid yearly, and the Business plan at $299 per month or $249 if paid yearly.
If you’re going with Teachable, I recommend the PROFESSIONAL Plan at $79/month (if billed annually) or $99 per month. The advantage here is that you get zero transaction fees and major educational facilities an instructor will need such as graded quizzes, custom completion certificates, advanced website theme customization, support for up to 5 admin users, and the most interesting infrastructure – “Advanced Reports”. Advanced Reports” helps you get all reports on ‘Students, Videos and Upsells”.
💡 Customer Support on Teachable
Inside your account, you can open a ticket or search the answered articles should it be your question must have been answered. Nevertheless, if you need help, the Teachable team will respond to you.
💡 Creating a Course on Teachable
Teachable presents a simple platform to easily upload your content, edit the look of your online school, and engage with your students – all this with your dedicated sub-website.
If you want more, you can make sense of their interesting extension – “Advanced Reports.
With it, you get all reports on ‘Students, Videos and Upsells”
Get started today with your preferred Teachable plan and join other experts and make money.
4. PODIA
For all the feminine bloggers and those who love super clean interface, you’ve got it with Podia. Since 2014, Podia had been empowering creative entrepreneurs to make a living doing what they love.
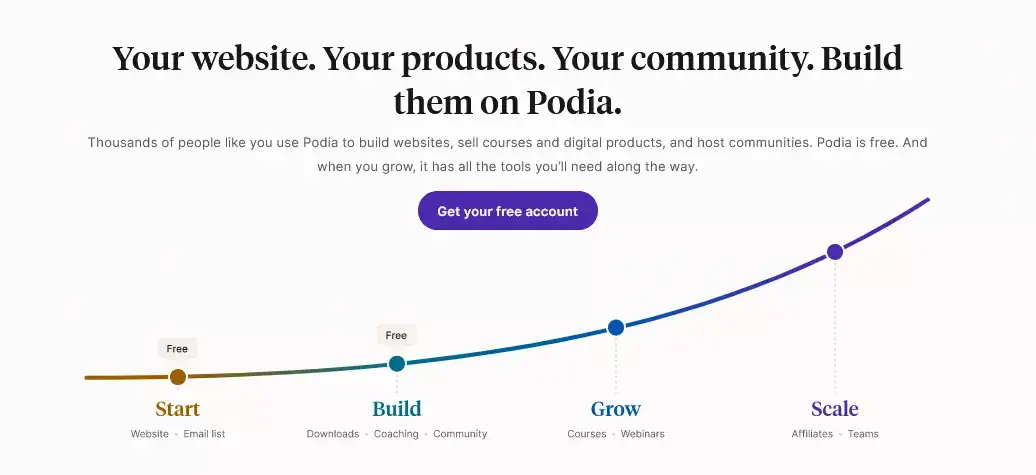
Podia is an online platform where content creators can sell online courses, digital downloads, membership subscriptions, and more.
In summary, if you’re a blogger, mommy entrepreneur, a nerd who gets bored with the complex tools, just sign up with Podia already, why?
Because they offer the most complete de-cluttered + go-to platform to host your online business.
–
More so, like Natalie, “if you’ve been searching for an all-in-one platform, at an awesomely affordable price, with a beautiful clean designer interface for too long. You will definitely thank Podia for coming into my life and allowing you to take your online education business to the next level!
Going forward, one of the selling points/features of Podia is the no transaction fees, and a simple three-step process for content creators they offer.
That is, all you have to do as a creator is to make the product, and Podia take care of the details for you.
The point is, that Podia hosts, provides templates, lets you make your sales page, take payments, and give your customers access all in one place.
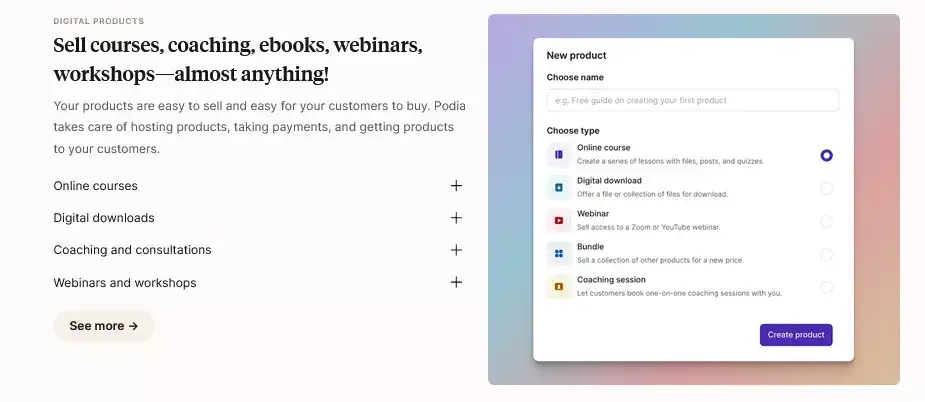
With over 50,000+ creators making use of Podia’s clean platform, you too can get started for free or see in full what they’ve got to offer. Let’s see.
Cons with Podia
- Not so good for institutional educators, but best for solo business coaches.
- Need for more integrations. More integrations would make it a super-flexible tool for those that love customizing their projects.
Pros with Podia
- It offers an intuitive interfaced platform for both beginners and advanced course instructors.
- Offers course instructors the capacity to sell product bundles — for more money.
- Course instructors are allowed to collect leads pre-launch as well as sell one-off digital products or membership sites.
- They offer super-intelligent integrations for course building.
- They will migrate your course from another platform to theirs, all for FREE –on paid plans.
- You can even send unlimited emails if you want. Also, you can add an unlimited number of courses if you want.
- There are no transaction fees.
- It allows unlimited Courses, video hosting, and unlimited users
- You can host unlimited students in your school. Pretty exciting.
Prices and Plans on Podia
Podia plans start at just $39 per month for Mover or save $78 when paid yearly. The next hosting plan is the Shaker plan which is $89/mo, or you get to save up to $158 when you pay annually. And the last plan is the newly introduced Earthquaker plan which starts at $199/mo or save $1790/yr (Save $358/yr) when you pay annually.
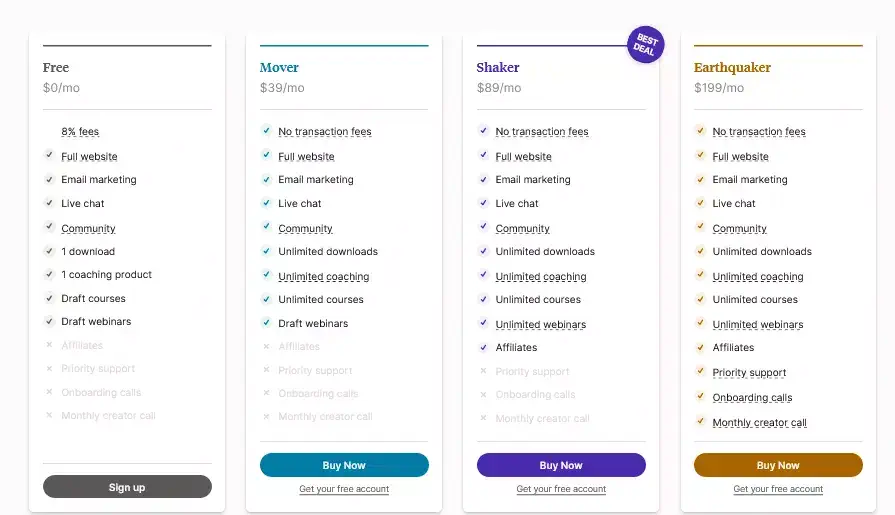
Whatever category you are in, you can get started for free with Podia. Also, you get access to all features so you can decide which plan is right for you.
➡ Try Podia free for 14 days, no credit card required
How to use: Building your Course on Podia
Here is how to get started on Podia.
When once you’ve signed up, enter your data and create your account. When done, go ahead and verify your account, and log in to your account to get started.

Upon signing in you will be presented with the modern type of interface a feminine blogger would love. Excuse me please, because I like it as well.

For the first section you have; Products, Memberships, and Messaging. Coupons. Email, Customers. Affiliates and Sales.
The second section shows you beginner’s video tutorials should you need any help to create your course. Also, you can join a demo and QnA.
On the right-hand side you have the function to: fill your bio, set up a membership, and create a product.
Looking down, the third section shows you your: customers, subscribers, sales, and margin.
The question is, what do you want to create first?
Whatever you want to create, Podia has everything you need to sell online courses, digital downloads, and memberships. You can set up and start selling in just 5 steps.
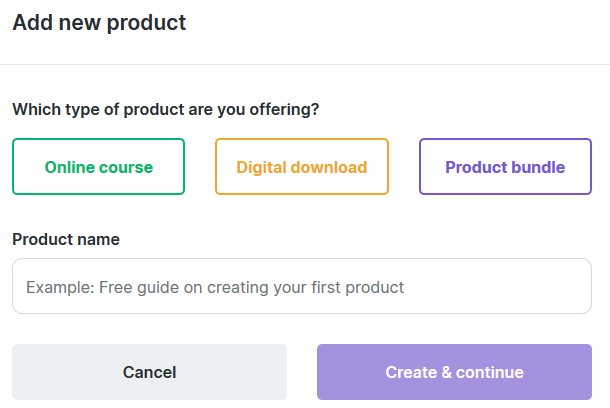
Choose the best option that fits what you want to do and move on.
With each option you select above, you have many extensions to customize it to what you want; Content, Settings, Pricing, Promote, Customers, Comments, Draft, and Preview.
💡 Make Money from your Course on Podia
You can easily make money on your course as Podia gives you the option to set up your Enrollment date. With this, you can choose to have your course start on a future date.
Students who purchase your course will be charged immediately, but won’t have access until the start date. Anyone who previously purchased the course will continue to have access.
Additionally, you can make sense of “UPSELLS’ and increase revenue by offering another product at a discounted price after the customer purchases.
You get paid instantly by accepting credit cards or PayPal payments.
💡 Integrations on Podia
Podia has interesting integrations but not as many as Teachable and Thinkific.
Prefer to use your own email service provider? No problem, just set up an integration with MailChimp, ActiveCampaign, Drip, or Convert Kit, or use Podia’s Zapier integration to connect with your favorite email tool.
Kindly note: Connecting an email service is not required, as Podia’s email marketing platform is included in your plan.
💡 Customer Support on Podia
My #4 recommended platform to sell online courses, digital downloads, and memberships is PODIA. It offers almost everything Thinkific & Kajabi do, has a cleaner interface than Teachable, and ultimately LIVE CHAT for content creators.
I like to rate the best customer-supporting platform best.
You know, customer support tickets were supposed to make customer service better, faster, and more efficient. But they didn’t.
That’s why Podia does not use such. They prefer you open up that chat window at the bottom of your screen, you connect with a real person – someone that’s there to share your triumphs, support your success, and lend a helping hand at every step of your journey.
💡 Creating a Course on Podia
If you are looking for a simple, beginner, feminine–like platform to create and sell your online courses, memberships, and digital downloads, then Podia is the perfect place.
Unlike other platforms, Podia never punishes you for your success by charging you more as you grow.
You pay a flat monthly fee no matter how much you sell. There are no additional transaction fees on Podia – ever.
All in all, if you’re looking for strong membership & digital download functionality, and the ability to increase your sales with the help of affiliates, Podia is a unique and best course builder to check out today.
5. SamCart
SamCart is a simple Digital Product eCommerce Platform for creators to start their online business such as selling digital products, sell physical products and services.
When it comes to a combo of selling Digital Courses, Ecommerce, Physical Products, and Services, just go with SamCart and make your digital business/product part of the over 9.7 Million Products Sold already.

Based on the design and management, they’ve shown that user experience is one of the main focuses of the software. Hence, it offers a clean, simple interface and fundamental features to create a viable product online business.
One of the biggest perks of this software is that any creator (beginners and advanced users) can get started and sell any product – digital, physical, and service, all in 3 steps – chose a ready-made template, upload content or product, and make sales using the built-in facilities.
Apart from the Edit mobile view options it offers, creators can A/B Test a product, use “cart abandoned or recovery performance options” which boasts Conversions, detailed reporting options which span across Sales Reporting, Page Conversion Report, Sales Channel Report, Failed Charges Report, Sales + UTM tracking, and more as you can see here.
Coming off to payments, they offer up to 5 payment routes such as Stripe, PayPal, Apple Pay + Google Pay, Authorize.net, Braintree, and others you can enable via 3rd-party integration.
To even show you how deep the options are, they allow Free & Paid Trials, and your customers can “Pay for what they want, AKA (PWYW). Exciting, right? Yeah. I love it too.
Popular SamCart Features and Pros
- Beginner-friendly and responsive for all users.
- Products Versatility – unlike other competitors where you can only sell digital products, with SamCart, offering physical or core services is not a problem as all the facilities to make it possible are available.
- Gives creators the options for Advanced Builders with diverse designs and templates.
- Creators get advanced options to Boost Conversions and Maximizing Average Order Value.
- Offers detailed analysis, tracking, and reporting.
- 0% Processing or Transaction Fees – no, you get to pay nothing in transaction fees as far as SamCart is concerned.
- Your customers and audiences have the full benefits of multiple payment routes.
- Offers advanced integrations to build an authority online course/business.
- Unlimited Options – instructors get to add unlimited students to their school, unlimited courses, products, and other add-on course contents.
- Offers manual human online chat support for creators.
SamCart Cons
- No free plan for beginners who might want such an option.
- Does not offer webinars as a core option – although can be possible with 3rd-party integration.
- Doesn’t offer facilities for advanced users or educational institutions, aka, it is best for solo creators.
SamCart Pricing and Plans
- SamCart pricing starts at $39 per month for “the Launch Plan” when you pay yearly with $470 saved yearly or $49 per month.
- The next hosting plan is “the Grow plan” which starts at $79/mo when you pay annually with $950 saved yearly or $99 per month.
- The third plan is “the Scale plan” which starts at $249/mo when you pay annually with $1910 saved yearly or $199 per month.
Customer Support with SamCart
Online Bot-Chat, Human Chat support, Email, physical office, and Knowledge Base.
Decision on the best plan.
Standing in as the most popular plan on SamCart, the “GROW” plan offers creators the rapt facilities to convert most visitors into customers, and increase the value of each purchase as advanced upsells options for passive income and advanced product management settings are available.
Free Trial & Getting started with SamCart
SamCart offers a FREE 14-day trial to put the software to the test. Ready to start Selling in 30 Minutes?
➡ Click here to get started with SamCart for free.
Also see – [Webinar] 10 Secrets to 6 Figures Training
6. LEARNDASH
Take nothing away from it. As a long-time user and fan of self-hosted WordPress CMS, if I were to create and take total control of my course, I would go with LearnDash. Why is this?
Apart from the fact that most bloggers use self-hosted WordPress, making use of LearnDash is just a sweet spot as the integration with WordPress makes it super cool.
Before we go on, it’s worthy to note that LearnDash is my #1 recommended online course software with WordPress integration due to 1. The advanced tools for course creators, and 2. WordPress integration, and most important, 3. Customer support, and advanced reporting.
So, if you are looking for a WordPress-integrated online course platform then LearnDash is where to go.
Knowing LearnDash & What it offers
LearnDash is an online course software that provides practical and experience-driven guidance for instructors and organizations interested in setting up online courses, with the best use of cutting-edge eLearning methodology and infusing it into WordPress LMS – Learning management system.
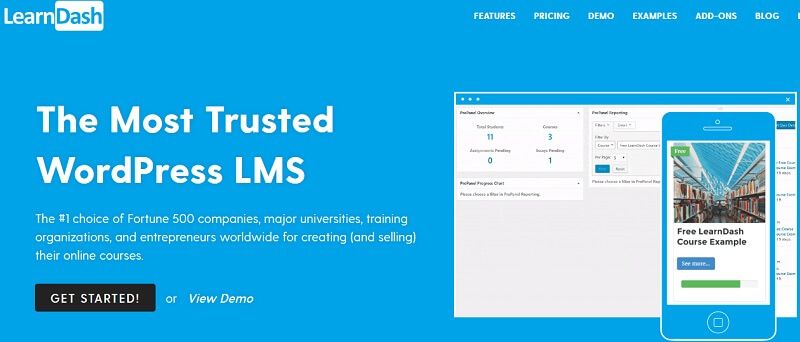
LearnDash works best for Educational Institutions, Developers, CEU Training Organizations, and more.
Some top websites using LearnDash include Yoast, the University of Michigan, Infusionsoft, the University of Florida, WP Elevation, and more.

Justin Ferriman & Kloé Ferriman are the figureheads at LearnDash (CEO & COO respectively)
Cons with LearnDash
- The costing price of LearnDash is the only viable con here, else, it offers what other competing tools offer and more of their inbuilt extensions.
- Customer support needs to improve with email support.
- No modern grading facility for class activities.
- Lots of third-party integrations need advanced options.
Pros with LearnDash
- Using LearnDash is as simple as regular usage of your blog. Publish content or turn them to a paid course using LearnDash.
- It offers an advanced reporting add-on for your courses.
- All your learning management system data are on your dashboard.
- You can see the real-time activity as users take your courses –like, the total time spent on the course.
- It allows unlimited Courses, video hosting, and unlimited users.
- It offers one of the most beautiful educational extensions to the course creator. Extensions such as quiz results, Certificates & Badges, Course Forums, assessments, scores, etc.
Prices and Plans on LearnDash
LearnDash offers only ANNUAL payments. The reason for this is to help course creators concentrate on their course, students, and monetization.
- The first plan is the “BASIC” which goes for $159.
With the BASIC PLAN, you can create unlimited courses and other premium options, but you’re assigned just 1 Site License.
- The second plan is the “PLUS PACKAGE” which goes for $189.
With the PLUS PACKAGE you can create unlimited courses and other premium options, plus, you get Up to 10 Site Licenses & ProPanel.
- The Third plan is the “PRO PACKAGE” which goes for $329.
With the PRO PACKAGE you can create unlimited courses, and other premiums options, plus, you get Up to 25 Site Licenses & ProPanel

💡 Signing up on LearnDash
LearnDash robust system has already helped course creators & entrepreneurs to make people millions of dollars, save businesses tens of thousands of dollars, decrease new customer refund rates, and more!
Now is your turn to join in. Signing up is free. All you need to do is click on this link to “Get a Full 30-Days to Try LearnDash!”
Starting out
Starting out, the “BASIC PLAN” offers just 1 Site License. To grab up to 10 Site Licenses + ProPanel, then the “PLUS PACKAGE” package will be a good fit.
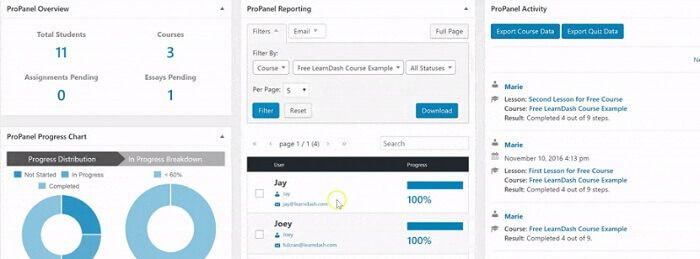
ProPanel: gives you a clearer dashboard and a reporting infrastructure. (More on this later).
💡 Selling Online Courses from your Own Website
If at any point in time you want to sell online courses from your own website, then please, LearnDash is what you want.
With it you can easily create & sell courses, deliver quizzes, and award certificates, manage users, download reports, take total control, and so much more.
The key concept of LearnDash is #1. Create Courses #2. Monetize it (them) #3. Administer total control #4. Tech – Build a faster course using provided tools.
How to use: Build Your Course on LearnDash

Here is how to get started on LearnDash. To get started on LearnDash you will have to choose a plan. Going with the “PRO PACKAGE”, enter your details, verify your account, and login to start creating your course.
When once you’ve signed up, sign in and see your WordPress Integrated dashboard. To add your course, go to COURSE, and click “Add New”.
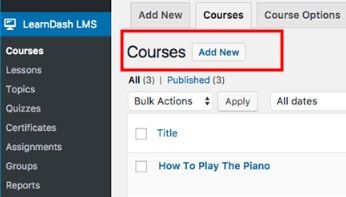
Go ahead and complete your course creation. When you need to preview what you’ve done so far, click the “Preview button” on the top right-hand side.
Alternatively, you can make use of LearnDash’s Powerful Course Builder.
LearnDash’s drag & drop Course Builder allows you to easily create multi-layer courses.
It is also the only course builder on the market that lets you re-use your content, making it easy for you to spin-up courses!
You can even rename the labels to anything you wish. For example, you can rename “Lessons” to “Modules”.
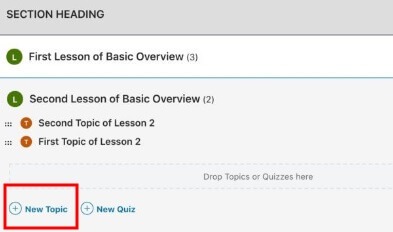
There are more than enough gadgets on your LearnDash Dashboard for your success, however, here are the infrastructures I like the most.
💡 Making use of LearnDash Focus Mode
You can make sense of LearnDash’s dedicated virtual learning environment, a feature your learners/students will like.
What LearnDash’s Focus Mode does is eliminate distractions and let your content shine – helping to increase learner retention and completion rates!
Additionally, you can add your own logo and brand colors for a truly immersive, branded experience!
Please note: Focus Mode is an optional feature. (That is if you do not want it). Let’s talk about other Advanced options.
- Advanced Quizzing
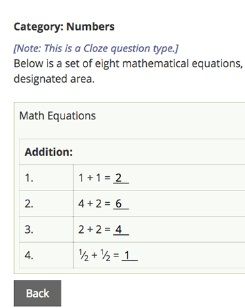
With LearnDash, you can choose from eight different question types with the options you need to customize the quizzing experience.
You can use this format: Single Answer, Multiple Choice, Sorting, Matching, Fill-In-The-Blank, Free Text, Survey, and Essay questions are all supported.
Others:
- Display custom messages based on quiz performance.
- Enforce Quiz timers and use Question Banks, and more.
- Course Points
LearnDash has given course creators the freehand to award points to learners as they complete courses, and allows learners to unlock new courses based on the points they have earned – great for letting them choose their own dynamic learning path!

The truth is, the above is just the tip of the iceberg if I want to consider the infrastructures LearnDash has provided. Find out more.
💡 Make Money from your Course on LearnDash
Having used the provided infrastructures to create your course, to make money.

Go ahead and set your price, choose the payment schedule, and start taking orders!
(If you go with the “PRO PLUS PLAN” you will be able to track and see your reports).
At this time you have to decide how you want to make money. Do you want?
- One-Time Purchase?
- Subscriptions?
- Shopping Cart?
- Memberships?
- Course Bundles, and more options.
The bottom line is, that whatever option you choose, they are all made available on LearnDash.
For instance, if you go with “Course Bundles” that is, sell your courses one at a time, or create bundles.
Using LearnDash 💡 for “Course Bundles” just takes a few “clicks”! When someone purchases a bundle they are then enrolled in all of the courses in that bundle. This is a great way to provide discounts for bulk purchases!
Again, LearnDash’s drag & drop course builder will help you to easily create multi-layer course bundles. You can rename the labels to anything you wish. For example, you can rename “Lessons” to “Modules” to “Bundles” and as you wish.
💡 Integrations on LearnDash
When you’re done – selecting your monetization method, go ahead and add “Any Payment Gateway you want”.
Seriously, I like the fact that course creators can add up to 300 payment gateways for students; PayPal, Stripe, 2Checkout, and 300+ others with WooCommerce. (A feature Thinkific is yet to have).
Apart from these 300+ payment integrations, you are allowed to use “Renewal Reminders” for students who are yet to pay or make full payment and etc.
And on top of this, you can use the “Refund Protection” infrastructure. With it, you can schedule content to lower your refund rates and increase revenue.
There are many more integrations to name here.

To be frank, LearnDash is so cool. So, when you discover that other course creators are making six figures in revenue on the platform, an example is Troy Dean, you shouldn’t be surprised at all.
#All thanks to the unapologetic facilities offered by LearnDash.
💡 Other advanced infrastructures on LearnDash
I have decided to keep some infrastructure out to save your time. Here are some of them;
LearnDash Focus Mode, Drip-Feed Content, Advanced Quizzing, Lesson Timers, Sample Lessons, Flexible Prerequisites, Course Forums, Gradebook, Course Points, Certificates, and Badges.
More…
Multiple Instructors, Simple Course Sales, Subscriptions, Memberships, Course Licenses, User Profiles, Email Notifications, Group Management, Detailed Reporting, Assignment Management, Expire Access, and more.
Kindly Note: Before we go further, in case you do not want to learn all I have said on your own, you are free to use the Video Tutorials provided by LearnDash. They’re clear and concise videos of the key LearnDash functionalities.
LearnDash’s Propanel:
Question; should you go for a plan with “ProPannel”? Answer: Yes.
Now ProPanel is an advanced reporting add-on for your LearnDash-powered courses.
ProPanel allows for quick assignment & essay management, displays learner data in charts & graphs, enables emailing features, and provides additional learner information (such as total time spent on the course).
With it you can:
- See real-time activity as users take your courses.
- Approve, delete, and manage all assignments & essays.
- View and download user course progress & quiz results.
- All your learning management system data are on your dashboard!
💡 Customer Support on LearnDash
Like Thinkific, LearnDash offers great customer support for course creators. If you need help you can easily click on “Questions” or open the “Help Centre” at the bottom right of your screen.

Also, they offer community support which you will join when you become a paid member.
Get started today on LearnDash here with a $40 discount and a full 30-day money-back guarantee on their annual plans.
7. Patreon
Patreon is a simple site for teachers who need a subscription-based platform that allows fans to support creators.
While you can start all for free on Patreon, they do charge high transaction fees via revenue sharing.
As a tutor, Patreon offers multiple (3) payment options for your audiences/students. Creators can accept payment via PayPal, Credit Card, and Apple Pay.
With a credit card, patrons can add it to their Patreon account as a payment method. The same with PayPal and Apple pay, although the latter is device-specific.
Patreon Features and Pros

- They offer a simple platform to build a community with your audiences.
- They offer advanced integrations to build your membership site.
- They offer multiple payment options.
- Patreon allows free usage (content creation) until you get fans.
- You can make recurring income by charging your fans on a weekly or monthly basis.
- Being a popular platform, fans can easily search and find content creators.
Patreon Cons:
- High fees – fees charged are directly proportional to the growth of the creator. More cuts with a larger audience.
- They charge high transaction fees (5-12%), taking a percentage from the creator’s funds.
- They do not offer instant chat support for creators.
- They do not offer complete online course-building facilities for digital downloads, selling courses, and more
- Limited or no facilities for educational instructors and institutions.
Before we go on, let’s see a comparison of the Top best 7 Best Online Course Platforms.
What is the Best Online Course Software for Instructors?

Here is a summary of the online course creation tools.
 As my number #1 platform for creators, Thinkific has a super scalable platform for both basic and advanced schools.
With her cloud hosting and advanced options such as the webhooks and JSON triggers, as an instructor, you can manage your school with high proficiency even if it’s your first time and the good news is that it is one of the cheapest online course platforms to use in the market.
Additionally, you have many course-building infrastructures and educational facilities options for support if you feel you need one at any point in time.
All in all, while the platform is too loaded for course building for instructors, if you need a basic setup, then you can simply click on “Add your payment details for your payments & click on create Course” to get started for free.
As I said earlier, the help button is below your bottom right in case you need any assistance from the team or use the other support channels.
So far, Teachable and LearnWorlds toe the same paths.
 If you want “a core” and popular online course platform with flexible options for teachers and instructors plus top marketing strategies to make money with your online course then you want to
Start a Free Trial on Learnworlds
![]() Teachable is popular and many known internet marketers make use of it. Also, their BASIC pricing plan is about $10 lower than Thinkific.
Teachable is popular and many known internet marketers make use of it. Also, their BASIC pricing plan is about $10 lower than Thinkific.
In conclusion, managing a larger user-base of online courses, and, while the customer support needs to improve, Teachable is worth the price if you can afford it plus the successes recorded so far.
![]() Podia has ALMOST ALL the infrastructures as available on Thinkific and Teachable + their inbuilt add-ons missing on the two.
Podia has ALMOST ALL the infrastructures as available on Thinkific and Teachable + their inbuilt add-ons missing on the two.
Like Learnworlds, Thinkific, and Teachable, Podia makes use of third-party integrations to help you build your program.
Podia offers ‘Unlimited Products, Memberships, and Unlimited Emails, not forgetting Live chat support “.
Fact is, if all you wanted was to be a platform to sell online courses, digital downloads, webinars, and memberships, then PODIA was originally built for that.
LearnDash.
 LearnDash is a complete course platform that offers the infrastructures and more like Thinkific and Teachable. The only separable factor with it is, that if you want to create an online course using your website and having total control, then, LearnDash is ideal for you.
With the LearnDash plugin installed on your WordPress website, course creation wouldn’t have been easier.
Get started with LearnDash – the WordPress course machine
SAMCART – Digital products, Ecommerce Services, and Physical products
![]() GO FOR SAMCART if you want a simple but advanced Digital Product e-commerce Platform for creators to start their online business such as selling digital products, sell physical products, and services – for solo users.
GO FOR SAMCART if you want a simple but advanced Digital Product e-commerce Platform for creators to start their online business such as selling digital products, sell physical products, and services – for solo users.
Patreon – Going with Patreon means that a creator does not care much about advanced course building and educational facilities, and does not care about the 5-8% revenue share and processing fees plus core online course infrastructures he or she wouldn’t get.
Visit Patreon
What is an Online Course Platform?
An online course platform is a software, plugin, or website that instructors, content owners, and entrepreneurs use to create educational materials or info products in form of free or paid courses for students and related audiences.
If you are an instructor, later on, you will see how to create an online course for free – as you can start totally free (0$) on these recommended online course platforms.
How To Create An Online Course as a Tutor

How do I create and sell online courses? This question can be tricky for beginners, most especially when they consider stuff such as “topics, revenue, and marketing”.
Because a lot of digital marketers all started as beginners and succeeded, you have no reason you shouldn’t succeed as well. Now let’s answer the question “How Do I Create and Sell Online Courses”
Step 1. Identify Your Market, Ideal Customer, and Audiences
You can do this before or after you’ve set up your course. How do I mean?
If before,
Creating an online course means you’ve found a vacuum that needs to be filled – this is how I found one in another niche on Quora. In fact, I had to bookmark the question because a lot of people had no credible answers to it.
The good news is, that this was something I did for over a year using a smaller platform and saw success.
If this is where you are, you can pinpoint a pain point and move on to create your course using any preferable platforms already reviewed. At this point, your target audience is already established.
If after you’ve identified your market,
Once you have set up your online school and equipped it with great courses, the next move is to get your first customers and that begins by identifying them.
This means that you will need to get as much information for your chosen ‘target audience’ as possible. This will help you associate their biggest needs with your services and products, hence increasing the chances of selling your course massively + upselling for recurring income.
Step 2. Estimate the Production Cost

Compiled by raccoongang.com, research by Chapman Alliance conducted back in 2010 states that an hour of eLearning costs ~$10,000 to produce. (This goes for basic course interactivity and media richness level; more features — more time and money).
Below is an infographic that shows an overall estimate.
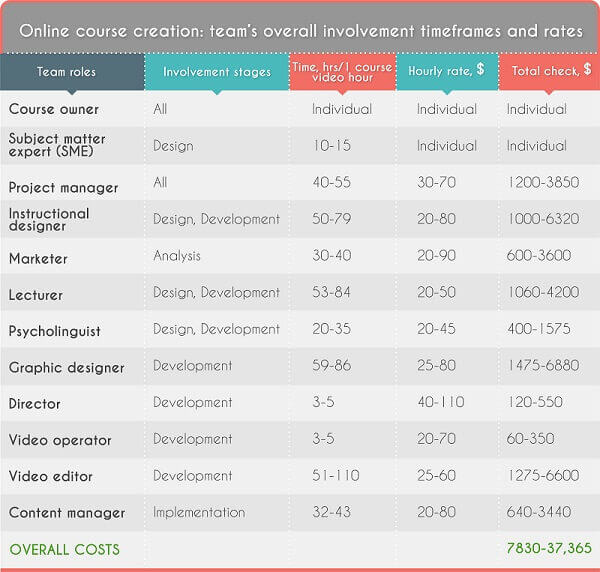
While the above can be staggering, truth is, figure out what you need and the ones you don’t as you can create a good course under $186.
Also, the good news is that any of the above course platforms have done the majority of the enlisted work for you.
Step 3. Start Course Research & Compilation
If you want to write around your course topic you can do this after it, else, go ahead and start researching your subtopics, statistics, and industry data that will help you to produce the best in the world course.
For me, I like to add 120% value to my audience. If you want to go for 150%, it’s even better as you can easily upsell your students and make recurring income (upselling is as good as the REAL course).
To start with, use platforms such as Reddit, Quora, and Topic + Forums. Do the same on Bing, Qwant, Search Encrypt, AOL, Swisscows, StartPage, DuckDuckgo, or more if you want.
Step 4. Choose your Course Topic
It’s time to choose a comfortable topic for your course. Truth is, no matter what you name your course it will be profitable as far as you’ve produced 95%+ super content.
Wait! Because you can name it anything doesn’t mean the name should be ridiculous, right? So, just choose a relative name you find interesting, and you are good to go.
See an example of Guitar Lessons.
- Guiter Junction
- Guitersy
- Guiter Diamond
- Guiter Limitless
- Guiter Coco
- Guiter Prism
- Guiter Flow
If you are puzzled about a name to use, jump to this site and generate a name for your course.
Step 5. Proof of the Effectiveness of your Half-Written Course
I learned this from Seth Godin. If you want to test how effective your product or program is, give it out to your trusted friends, if it is as good as you think, they will be your first customers and referrals. That is exactly what you want to do.
That said, go ahead and share a sample or the page link of your MODULE 1-3 course to your F& F for them to have a piece of it.
Wait, what if you do not want your F & F – Family & Friends to know you want to make money online? My Gosh here is it.
Go to any online forum, let’s use Reddit.
Go to a related niche subreddit and create content around your topic and leave a link to your course by saying” hey, I created a full FREE course on your TOPIC in case anyone wants to check it out, kindly leave your comments to help me”, thanks.
You’re far from being done.
Don’t get excited yet until 5-10 hours later. Only get excited if your content is still there because some Reddit Moderators are always paranoid.
If they delete your content, go ahead and open a conversation with them. With this, there is a high chance it will be reapproved.
BUT, if after 3 times they are still showing their bad-asses, move to another forum. Check out Indiehackers.com
When you do this, DO NOT FAIL to ask the readers or testers to subscribe to your email list so as to get the full Modules.
You can use an effective tool like GetReponse for it, or EmailOctopus if a free tool is what you want.
Course Creation Tools to Use
You might not need this part if your laptop or computer has a built-in camera and a microphone. But if not, here are some tools to help you out.
Screenflow – screen-sharing software out there. It will capture your screen and voice as you navigate your computer and explain your actions.
Others: Camtasia, Screentomatic, ScreenRec (Free), OBS Studio (Free).
Audio Technica ATR 2100 – The ATR 2100 is an affordable microphone for most online course creators.
Or,
Blue Yeti USB Mic– for Recording & Streaming on PC and Mac, 3 Condenser Capsules, 4 Pickup Patterns, Headphone Output and Volume Control, Mic Gain Control, Adjustable Stand, Plug & Play.
Logitech HD Pro Webcam C920 – a high-quality video camera where you can clip it onto your computer and start recording HD videos.
Or Panasonic HC-V380K, has Wi-Fi mobile device Twin Camera feature adds multi-camera scene picture-in-picture recording.
(The last 2 tools are on Amazon.com)
Step 6. Create Your Course Content in Full
Now the teaser is out, and you’ve got a bite of your stand – good words about it or bad reviews. If good, you are free to write full content, and if bad, you might need to revisit your root and plan.
Just as Seth Godin will say,
“Marketers make things better by making change happen.”
“Don’t find customers for your products, find products for your customers.”
“You can’t fool all the people, not even most of the time. People, once unfooled, talk about the experience.”
“People don’t want what you make. They want the way it will make them feel, and there aren’t that many feelings to choose from.”
“You’ll never be able to serve everyone, which is comforting since you’re less likely to be disappointed when it doesn’t happen.”
Just find your missing piece from Godin’s quote, and re-write your course.
However, do not focus on perfection because I have learned that no matter how GREAT & IMPORTANT a video is on YouTube it will still get DOWNVOTES – by some group of persons I can’t really describe.
So, edit what you need to then go ahead and set out the top considerations before composing your course in full.
Top Considerations & Questions for a Perfect Course
From the lines of Thinkific,
Take a really critical look at your proposed curriculum. Try and get rid of any extras or unnecessary steps. Ask yourself things like:
- Is this Step crucial to getting to this Milestone?
- Is my student actually learning anything here?
- Can these Steps be combined?
- Would my audience already know this going into the course?
- Is this Chapter too long? Too short? Can I combine it with another?
- Would I have taken this course when I was getting started?
At the end of this exercise, you should have a solid structure for your course.
Having done some or all of the above, go ahead and create a stunning course you would like to make money off it in the next 1 -2 years.
This is so important because a course creator like John Lee, since 2013, has been making money off the very one course he created 7 years ago…So, do it well as if you want to get paid forever.
Step 7. Choose a Platform to Host Your Online Course
After creating irresistible and unapologetic content, the next step of action is copying and pasting your content on your preferred course platforms.
We have talked extensively about it. Just go ahead and choose one that fits your needs.
As a reminder,
If you want to use your WordPress blog and create your course with total control, you need LearnDash,
If you need a standalone course platform with many integrations + recurring income via Upsells, you need Teachable,
If a platform for Courses, Digital downloads, and Membership + instant customer support, you need Podia.
And for an all-performing platform with a cheap price to get started, Learnworlds offer you that flexibility with a variety of customer support.
Make Use of All Integrations
First of all, you want to make use of all available integrations each of the course platforms provides. Popular integrations include tools like GetReponse, Google Analytics, WordPress, and more.
If you are using your own WordPress Blog or course platform like LearnDash you have unlimited tools to use, however, there is no need as what you need is made available by LearnDash.
Step 8. Market your Course
Your course is as good as nothing except people find it.
Here are some places and avenues to share and market your course.
- Quora
- Podcasting
- Paid Traffic
- Guest Posting
- Facebook Ads
- Google Ads
- Facebook Page
- Banner Ads
- YouTube Ads, etc.
Pin-pointing Facebook Ads
For Facebook Ads, you do not have to create a Facebook business account. You can make use of a simple Facebook page and run a $20 ad to create the first awareness.
Give Support
I like to give support to my audiences on anything paid, because paying for what you sell means they trust you.
If you want to stand out as a great digital marketer then you might want to provide support for challenging students.
That is it.
With this, the question of “how to create an online course” is answered.
Congratulations. 😀
You’ve just joined the rest of the entrepreneurs to have a test of recurring income.
Final Notes on the Best Online Course Software Platforms for Instructors
Devoid of the platform you use, the best tool is creating an incredible course for your students and audiences. And the good news is that we‘ve done a great job to enlist all you need to make this possible.
Considering the course platform or software to use,
Just as we have seen, all the best online course platforms have their Alphas and non-explorative features and benefits, which allows us to go for what fits our best interest.
As for a platform with good customer support and with advanced infrastructures to craft a perfect online school, then I recommend you go with Thinkific as you have more than enough facilities to craft your course.
–
If you want also “a core” and popular online course platform with flexible course building options plus top marketing strategies then you want to Try out LearnWorlds.
–
If you want to start creating and selling online courses using a simple platform with moderately advanced facilities, I recommend you get started with Teachable.
–
And if you want a platform for selling online course, Webinars, Digital download, and Membership + instant customer support, then start with Podia.
In summary, if you’re a blogger, mommy entrepreneur, and solo business coach, just sign up with Podia already.
–
SamCart is all about using a simple and intuitive platform to sell digital products or online services. It pretty much offers the easiest way to start accepting orders.
–
For LearnDash, you might want to host or sell online courses from your own WordPress website if that is the case, then start with LearnDash.
–
Patreon is all about going for a subscription-based platform that allows your fans to support your project or content.
That’s it.
Let me know what you think.
Ref: Thinkific Vs Teachable vs Podia comparison. | Thinkific vs Teachable vs LearnWorlds


Some genuinely interesting information, well written and broadly speaking user genial.
Thank you, Nathan. Appreciate it adds value to you.